AWS IAM is one of the most powerful and important services enabling secure access management to AWS services and resources. With AWS IAM, we can create and manage AWS users and groups, and use permissions to allow and deny their access to AWS resources.
IAM is free to use & Global Service
It provides infrastructure as a service (Iaas).
IAM deals with 4 terms such as users, groups, Roles, and Policies.
It controls both centralized and fine grained-API resources plus a management console.
You can specify permissions to control which operations a user or role can perform on AWS resources
IAM service provides access to the AWS Management Console, AWS API, and AWS Command-Line Interface (CLI)
AWS IAM — Key Features
Let’s look at some of the key features that make IAM so versatile and powerful:
Authentication: Authentication confirms that users are who they say they are. AWS IAM lets you create and manage identities such as users, groups, and roles, meaning you can issue and enable authentication for resources, people, services, and apps within your AWS account.
Authorization: Authorization gives those users permission to access a resource. Access management or authorization in IAM is made of two primary components: Policies and Permissions.
Authentication in IAM
Authentication or identity management in AWS IAM consists of the following identities:
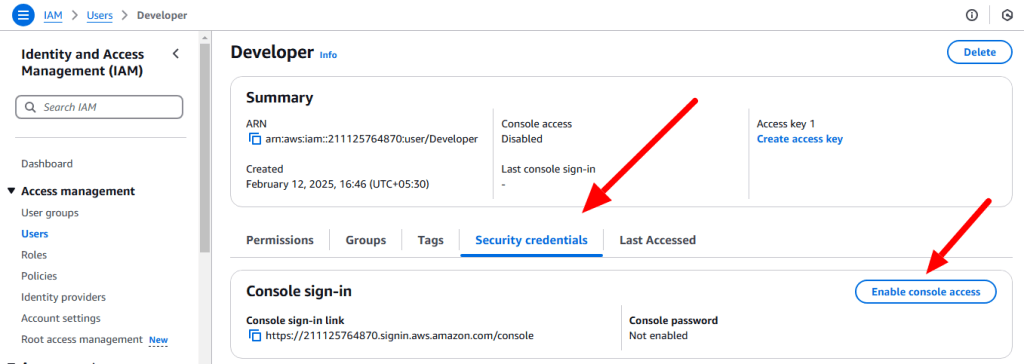
Users: An IAM user is a user who can have the access to our console resources with username & password having permenent Access key & Secretkey.
Instead of sharing your root user credentials with others, you can create individual IAM users within your account that correspond to users in your organization. IAM users are not separate accounts; they are users within your account.
By default, a new IAM user has NO permissions to do anything.
Groups: An IAM group is a collection of IAM users. You can organize IAM users into IAM groups and attach access control policies to a group. A user can belong to multiple groups. Groups cannot belong to other groups.
Role: Communication between the different services using the role. A role does not have any credentials associated with it. An IAM user can assume a role to temporarily take on different permissions for a specific task.
Authorization in IAM
Authorization or access management in IAM is gives those users permission to access a resource.
Policy: A policy is a document with a set of rules, having one or more statements. Each policy grants a specific set of permissions and can be attached to any of the IAM identities users, groups, and roles. olicies are always written in JSON or YAML format and each policy has a name.
There are three types of policies are there.
AWS Managed policies
Customer Managed policies
Inline Policies
AWS Managed policies: An AWS managed policy is a standalone policy that is created and administered by AWS. Standalone policy means that the policy has its own Amazon Resource Name (ARN) that includes the policy name.
Customer Managed policies:
Customer managed policies are standalone identity–based policies that you create and which you can attach to multiple users, groups, or roles in your AWS account. You can manage and create policies using the AWS Management Console, the AWS Command Line Interface (AWS CLI), or the IAM API.
Inline Policies:
These policies are directly applied to IAM entities. You use inline policies for a specific objective, which makes them non-reusable.
Become an IAM Policy Master in 60 Minutes or Less:
Liked This Article?
Hands-on IAM :
1. Create IAM user and give only s3 & Ec2 full access.
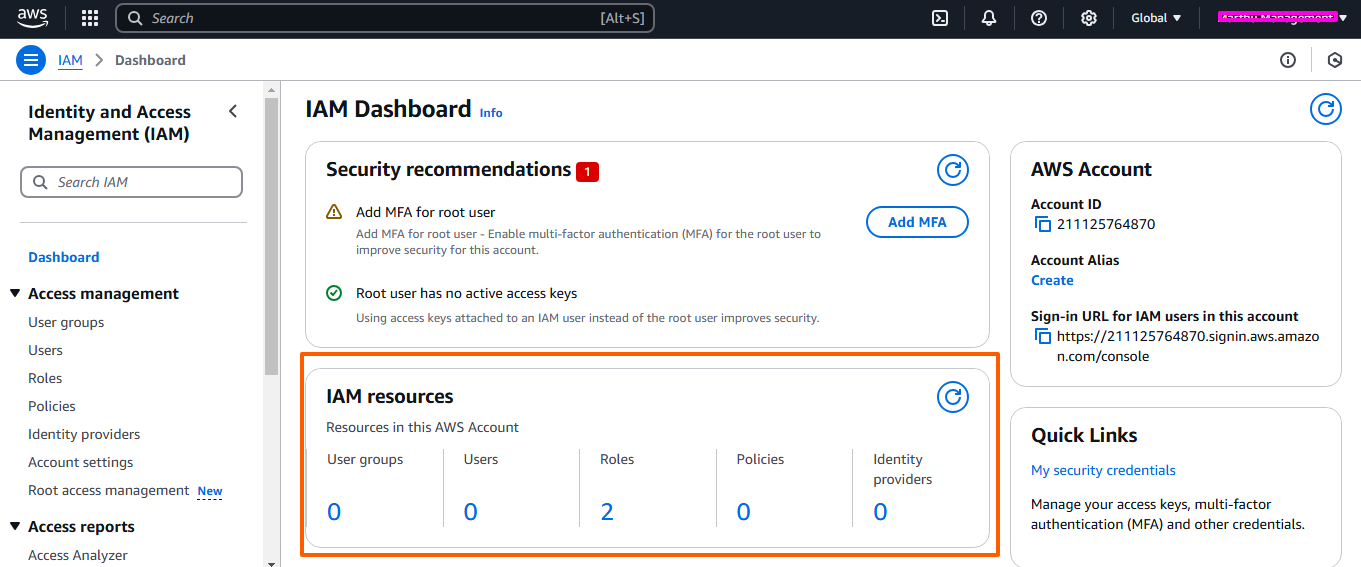
Given below is the IAM dashboard. Here you will get all the information about the IAM resources running.
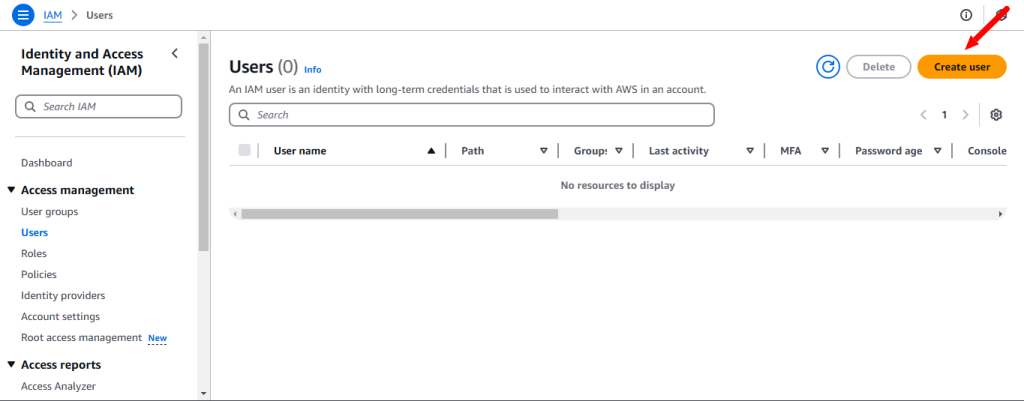
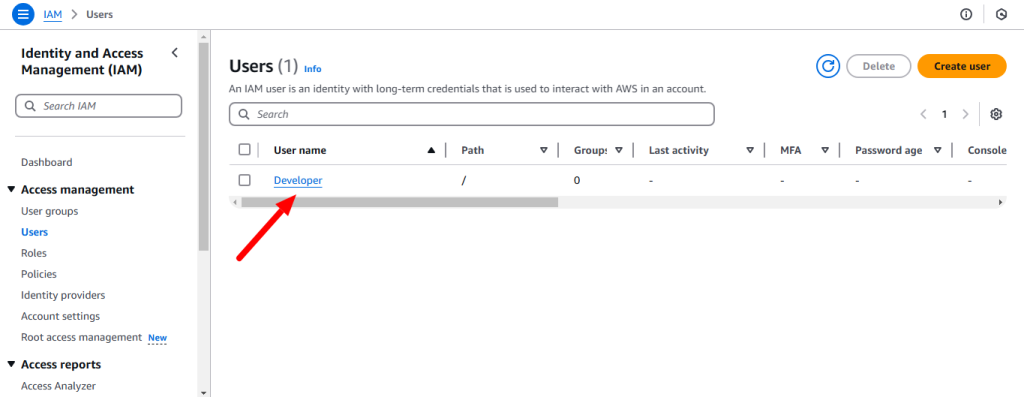
To Create a new user, Click on Users & Click on Add User to add a new user.
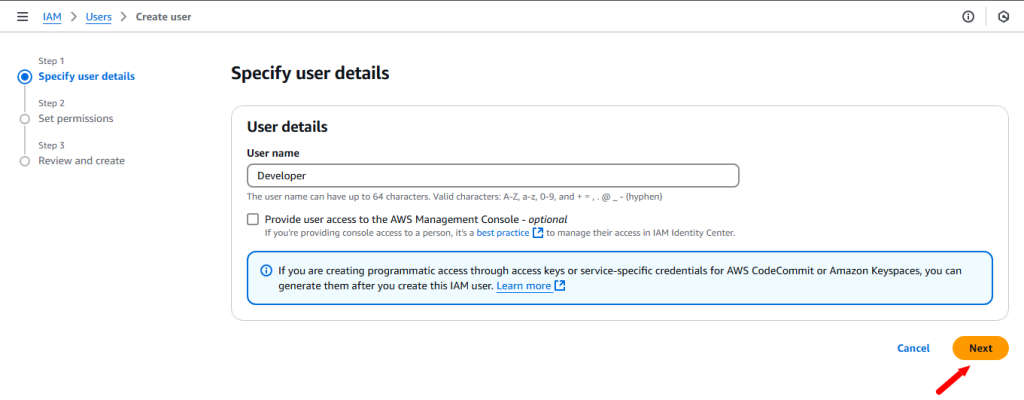
Set user details.
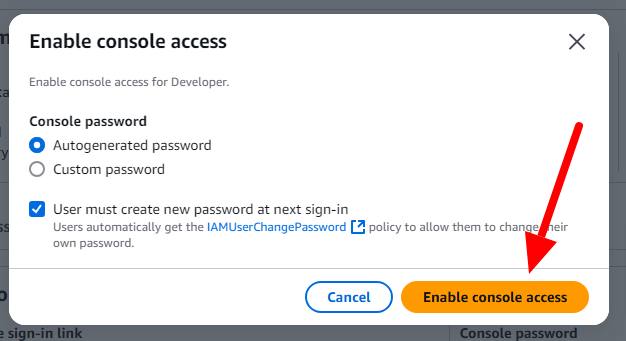
Provide Username*, Access type*, Console password*. Then click on Next: Permissions.
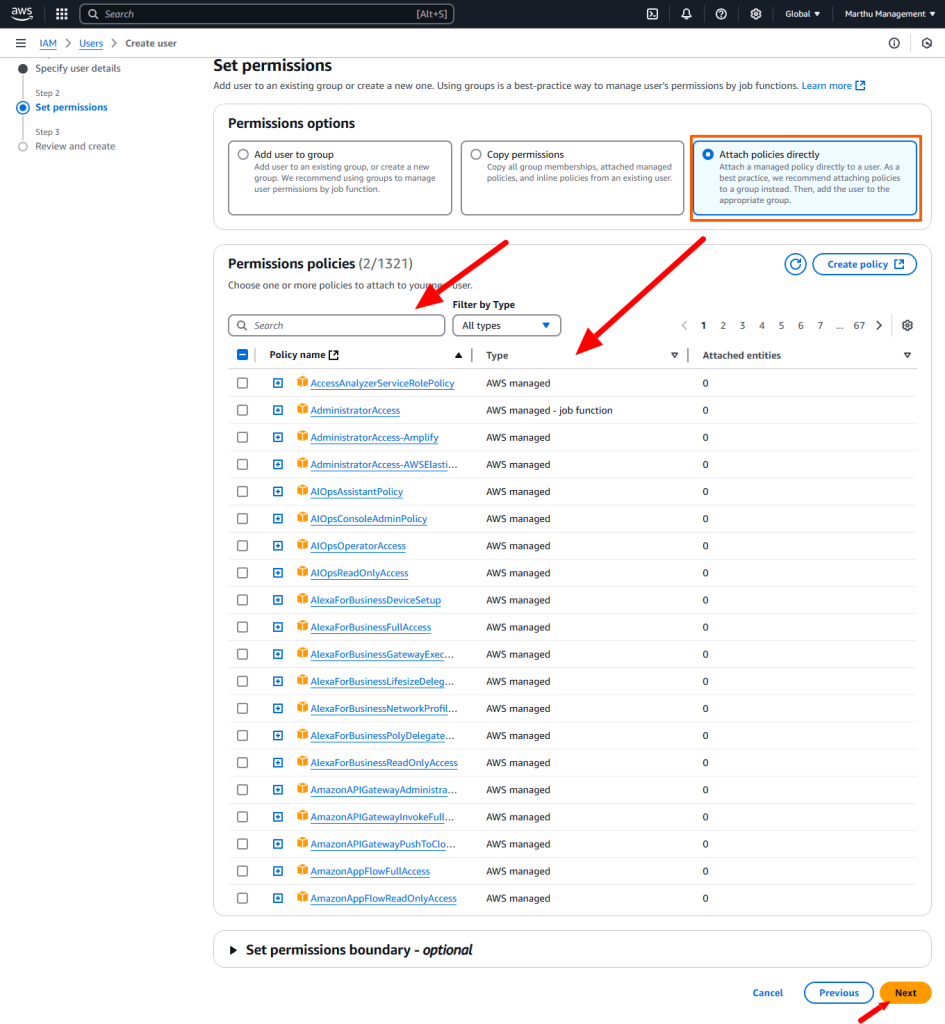
Set permissions for Admin.
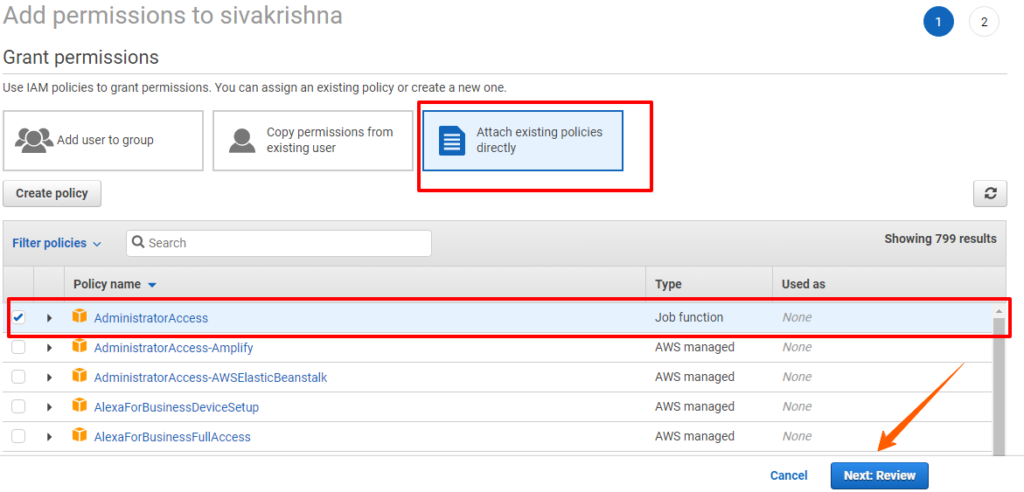
Add user to the group (or) Copy permissions from existing user (or) Attach existing policies directly. Select the required option.
Here I’m selecting Attach existing policies directly.
Click Next: Tags
Add tags if you need.... it is optional
click next : Review
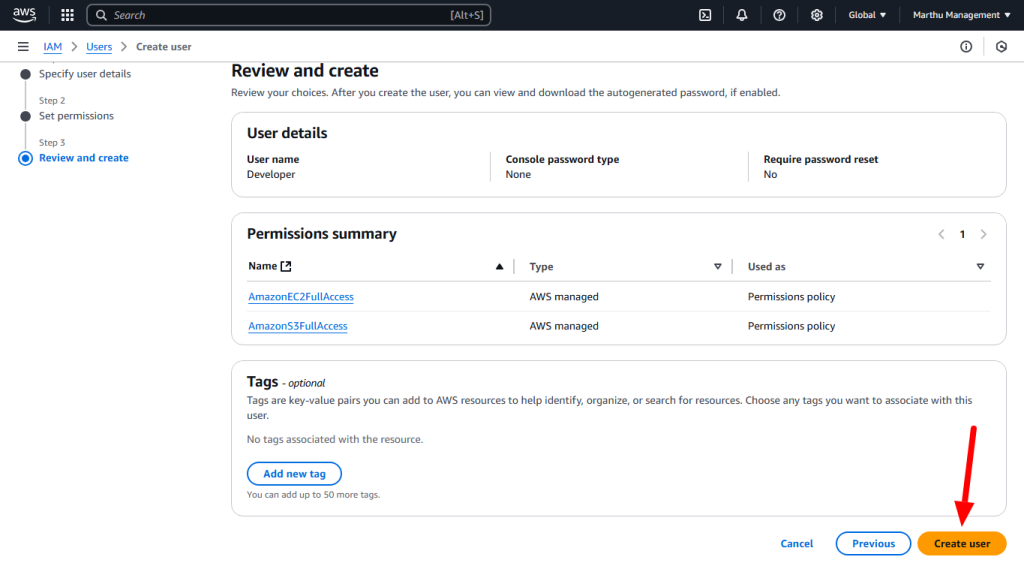
Check all the details in Review. all are correct click the create user.
click next : Review
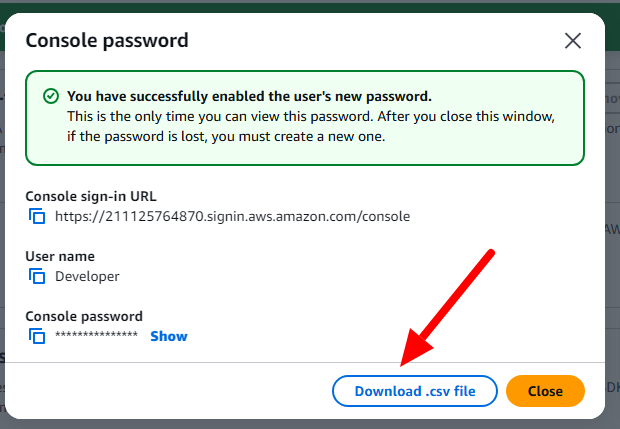
User created. download the access key & secret key. if you have team send these details via e-mail.
Keep it these details personally.
Login & Check S3 & EC2 Services.
2. Attach RDS full access policy to already created IAM user
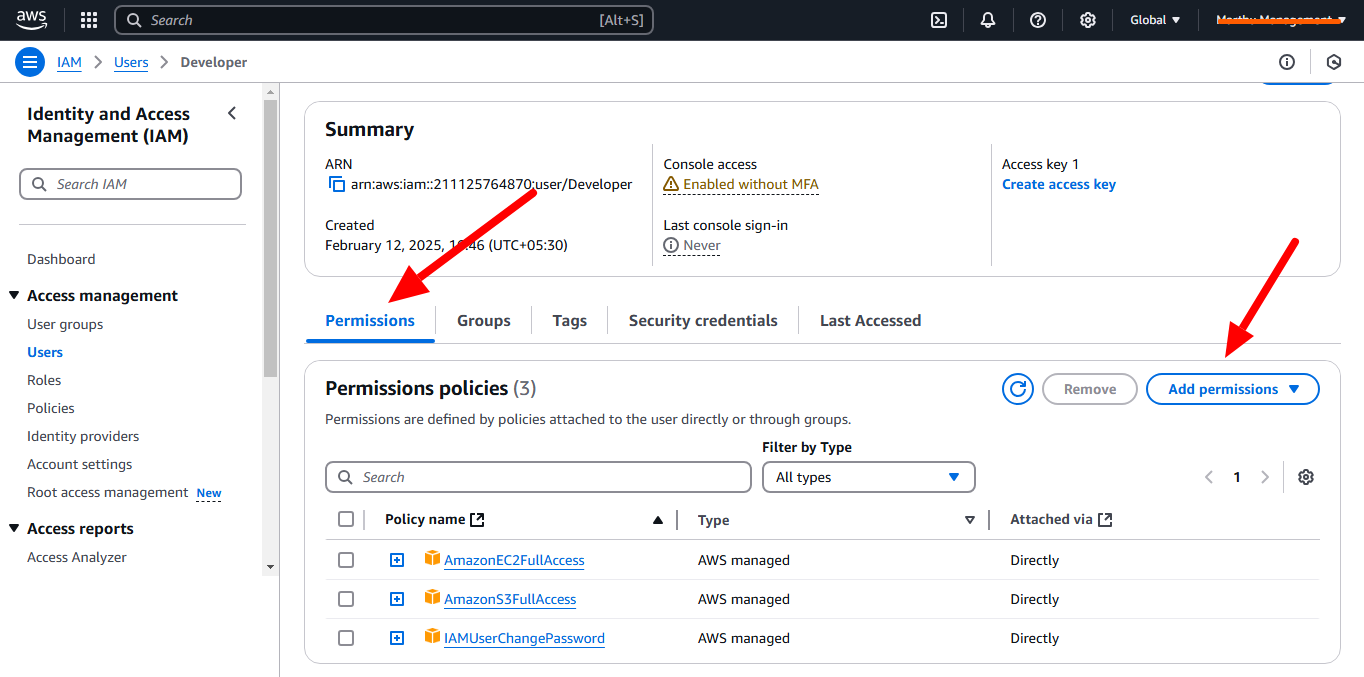
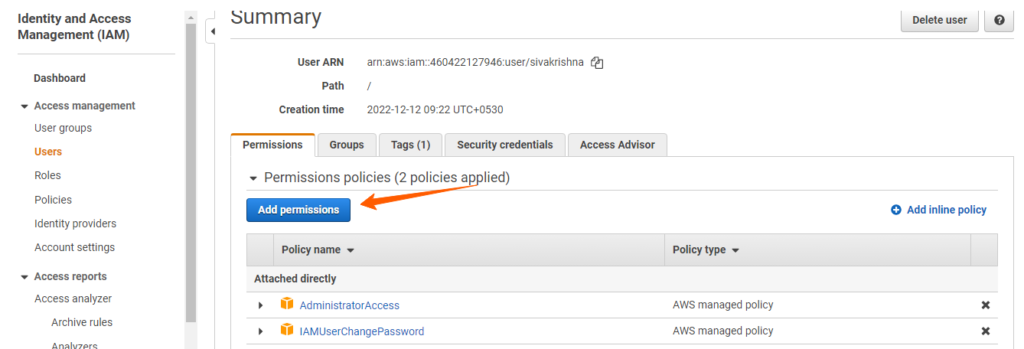
Click on users and click the Sivakrishna user.
Click on Permissions.
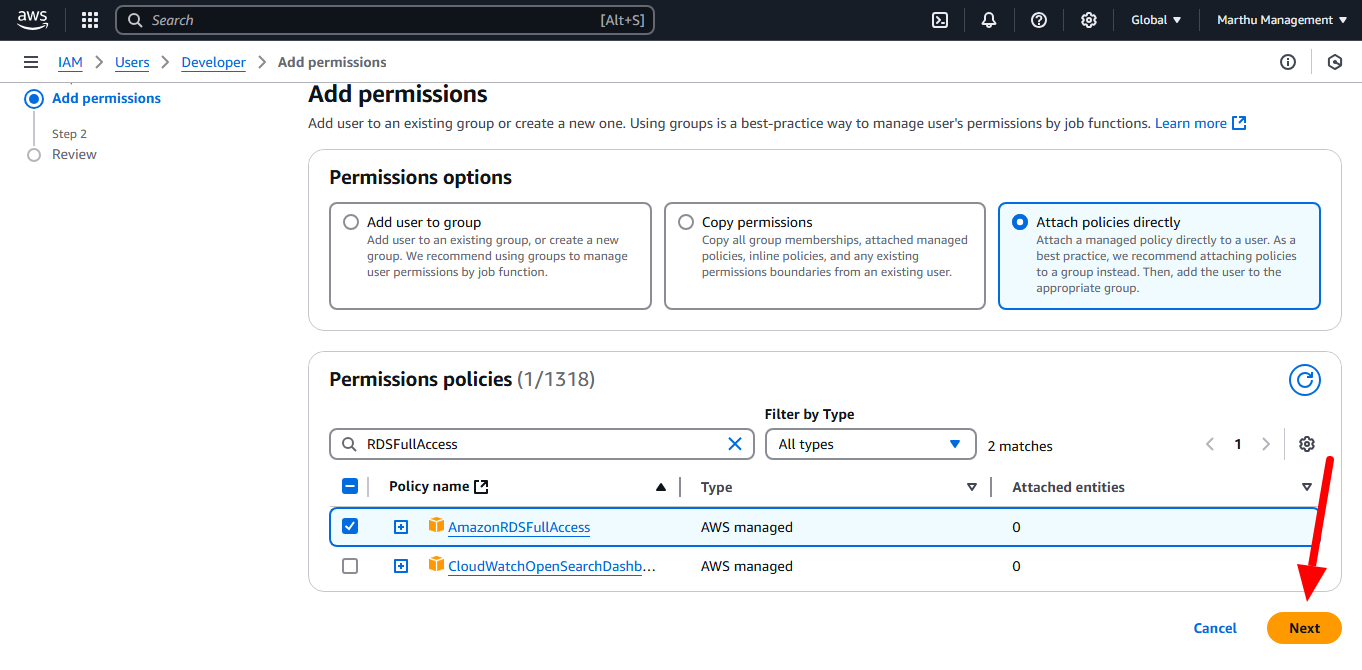
Add the RDS full access policy.
Click next; Review
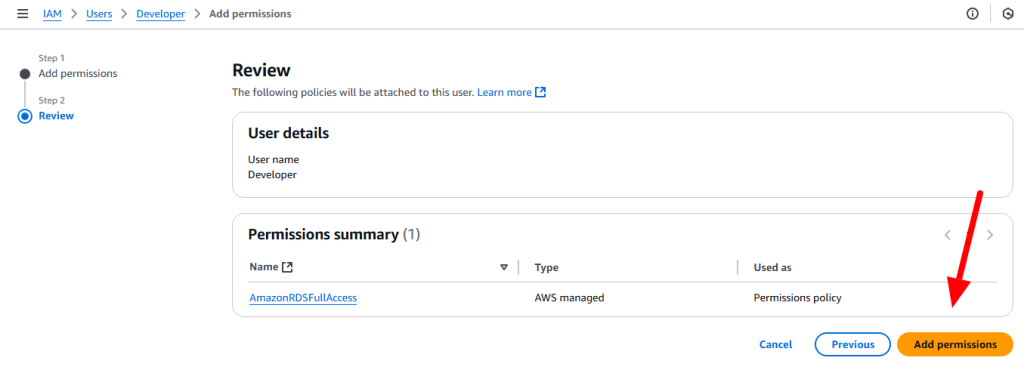
Check add correct policy or not.
Click next : Add permissions
Now added the RDS Full access Policy.
3. Create IAM role and give access only to s3
Given below is the IAM dashboard. Here you will get all the information about the IAM resources running.
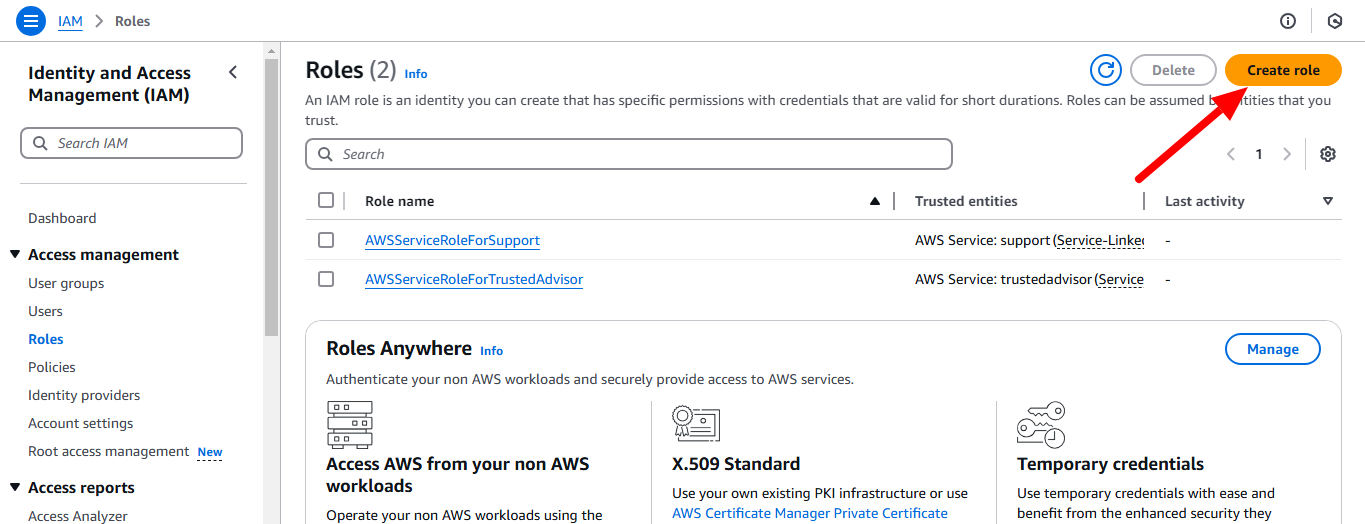
To create an IAM role via AWS console.
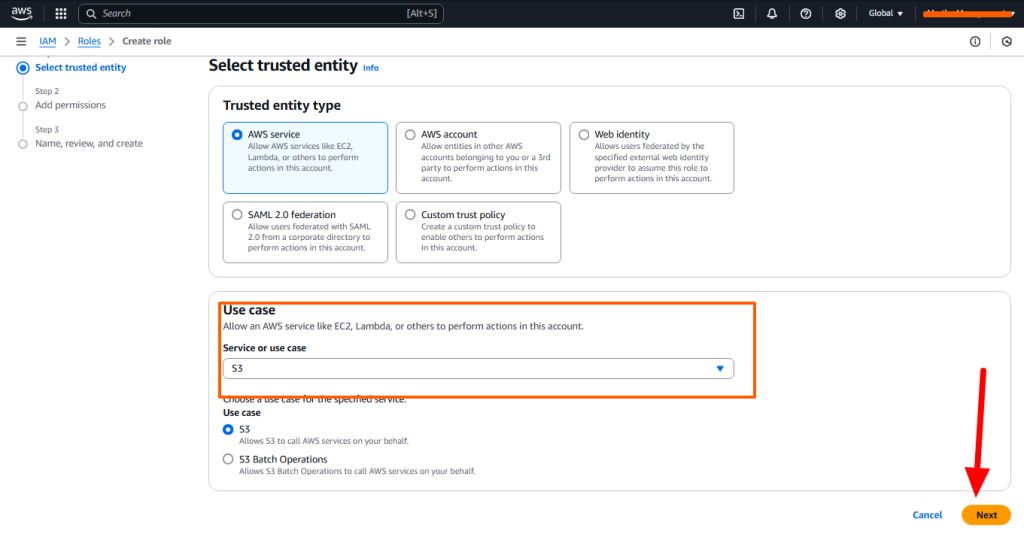
To Create a new role, Click on Create role.
Then select the AWS Service for which you want to create the Role. For example, you can create a role for EC2 through which EC2 will be able to access S3 buckets. After selecting the AWS service click on “Next: Permissions”.
cllick next
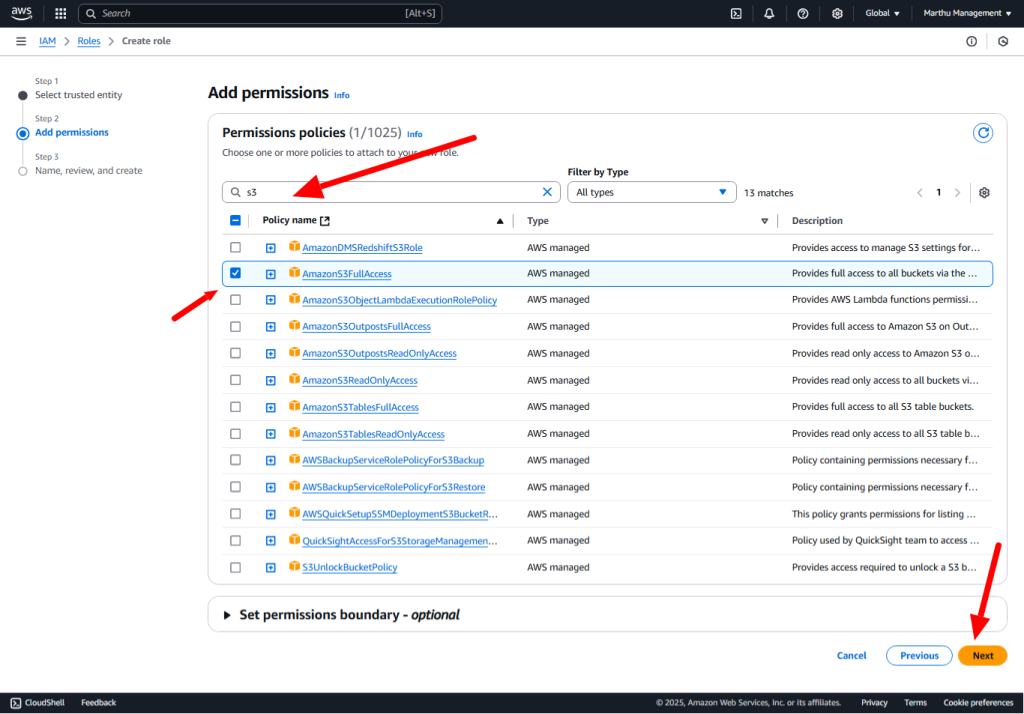
you can select the type of access you want to grant to your selected service in our case its EC2. You can grant different types of access like Full Access, only read access, read and write access, etc. in the below picture we are granting AmazonS3fullaccess to EC2.
click on next
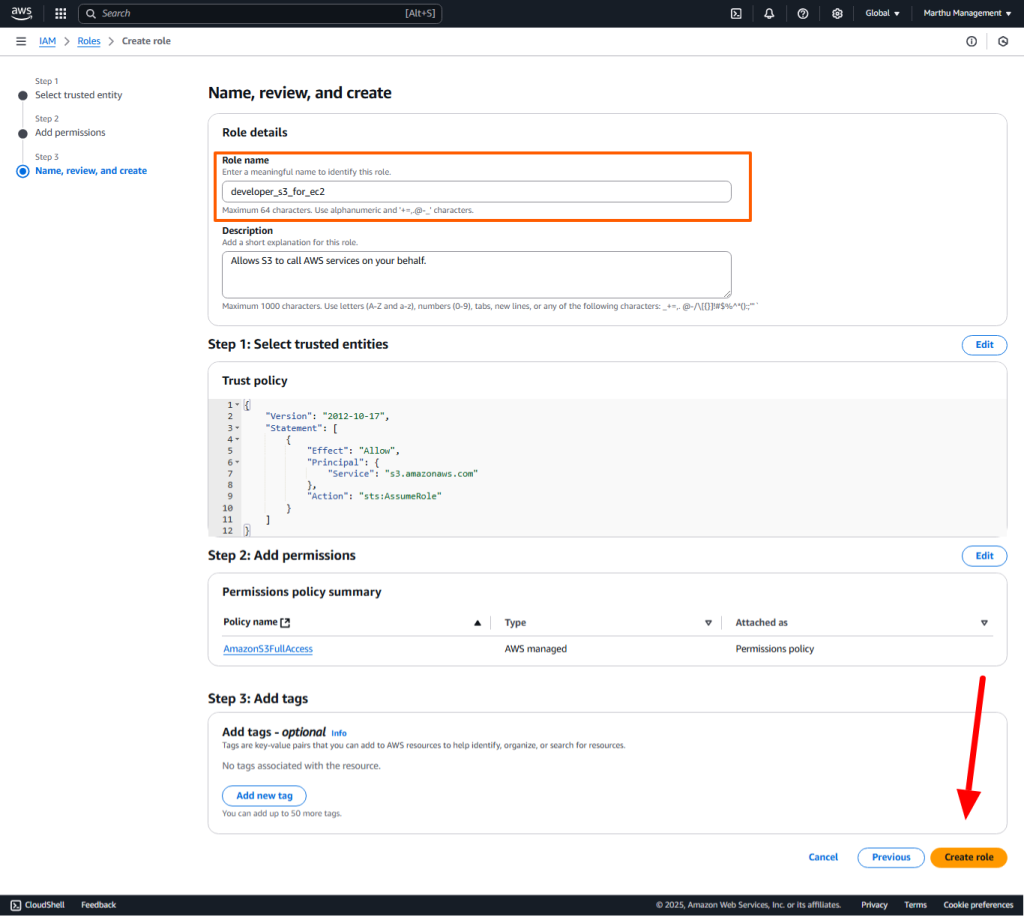
you will be in the review section of the role where you need to provide Role Name and its description. You can also review which policies you have attached and also the tags if you have created. After reviewing your role, you can click on “Create Role” as shown in the image below.
click on create role
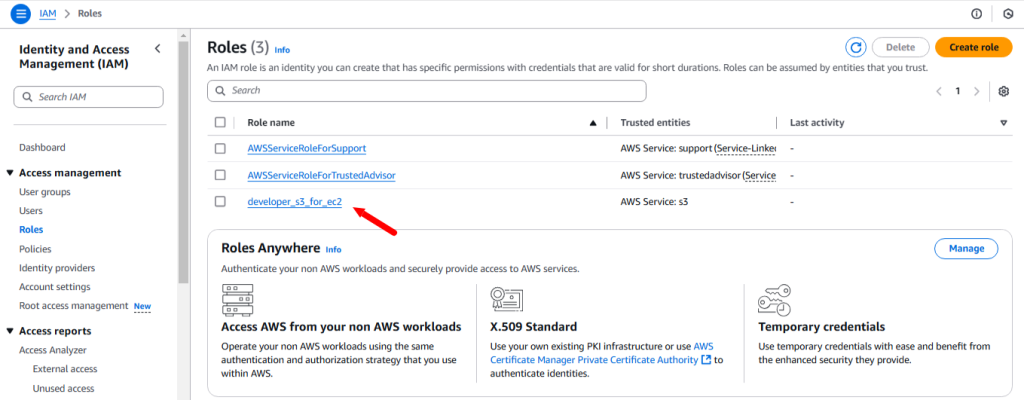
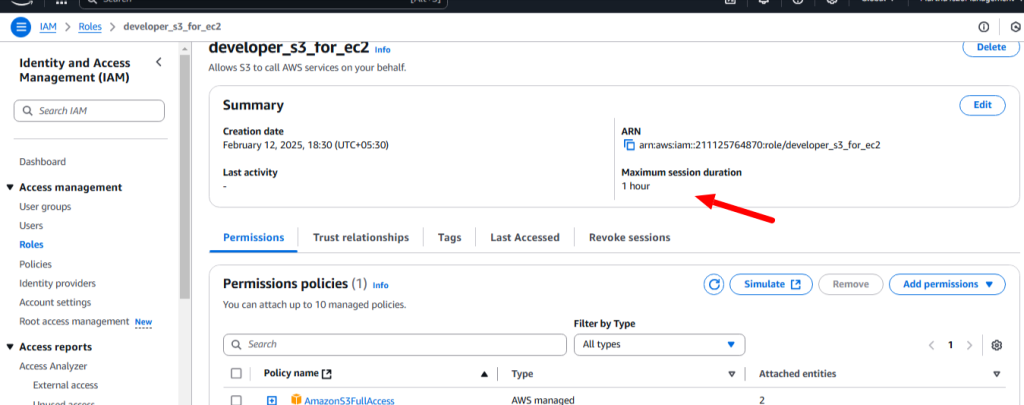
Then you will be able to view your role in the IAM dashboard under the Roles tab as shown below & open the role & check.
3. How to Connect s3 using EC2 via IAM Role
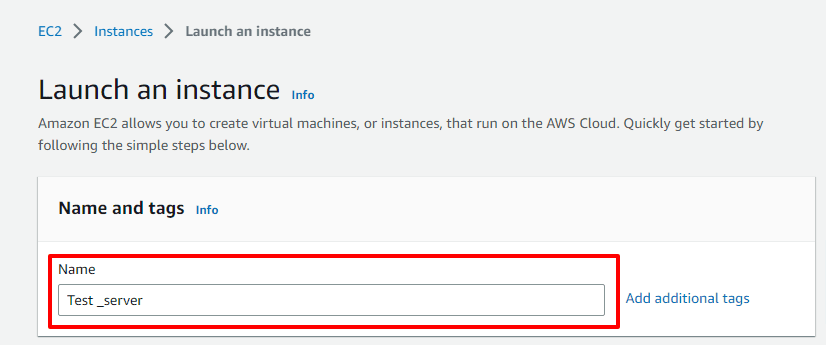
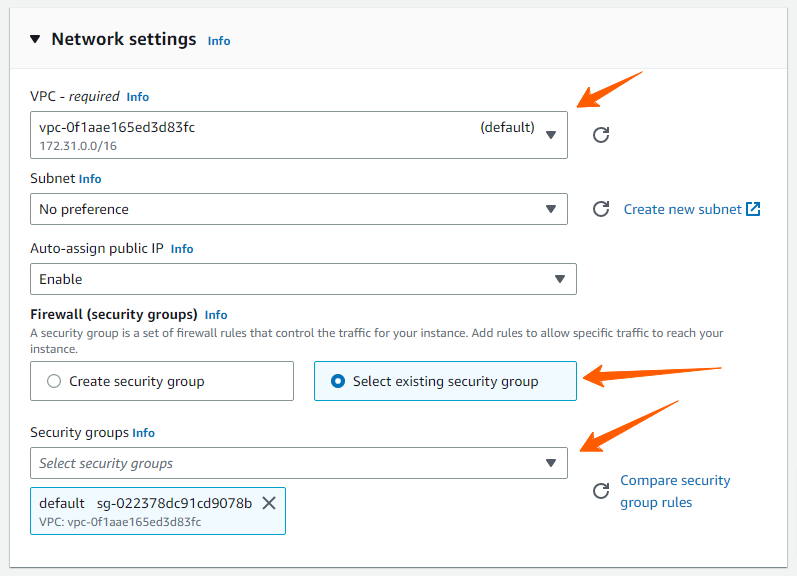
Create an EC2 Instance by going to the EC2 Dashboard and clicking on Launch Instance.
Now open Below screen shot... Give name for EC2 instance.
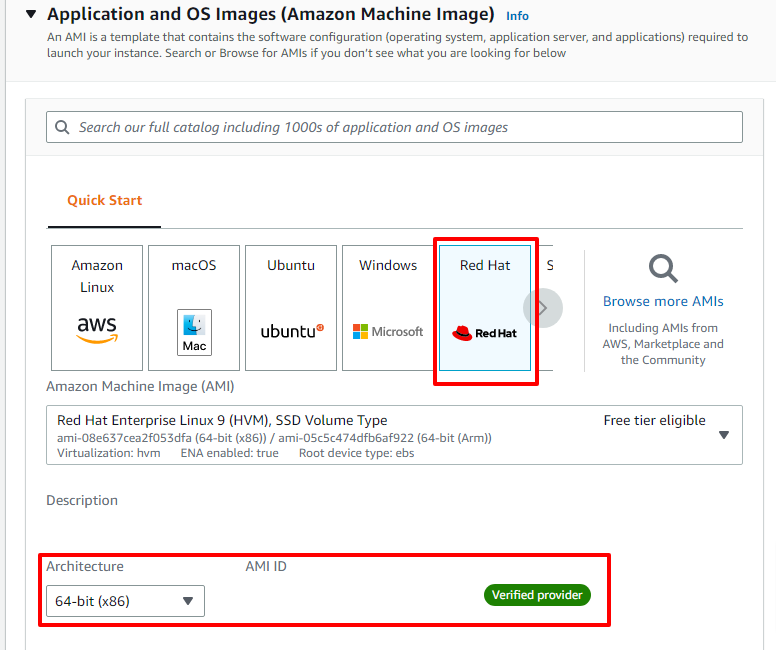
Then come to Select Os & Architecture.
Then Select the instance type. choose the free tier Instance t2.micro.
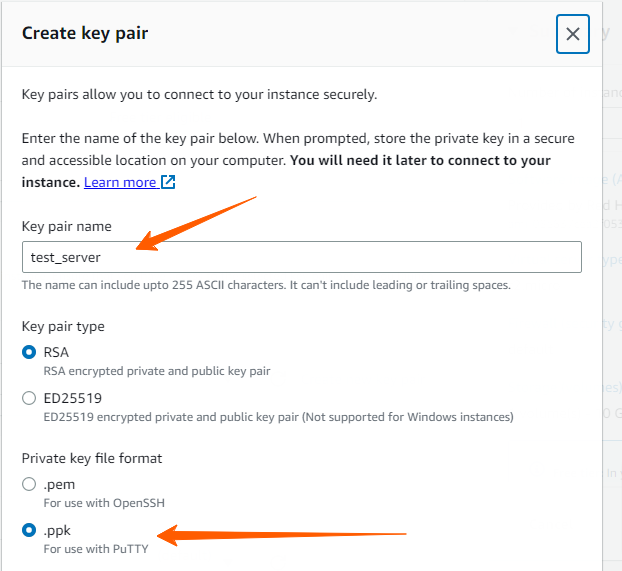
Then coming to key-pair. click the create new key-pair. then following below screen shot.
Now Give Key pair name & select key pair type & choose private key file format.
if you putty Choose ppk format & if you use other SSH tools choose .pem format
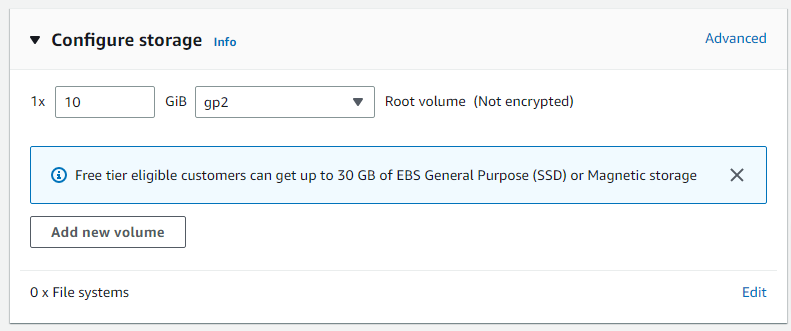
AWS gives Default values... no need to change these values.
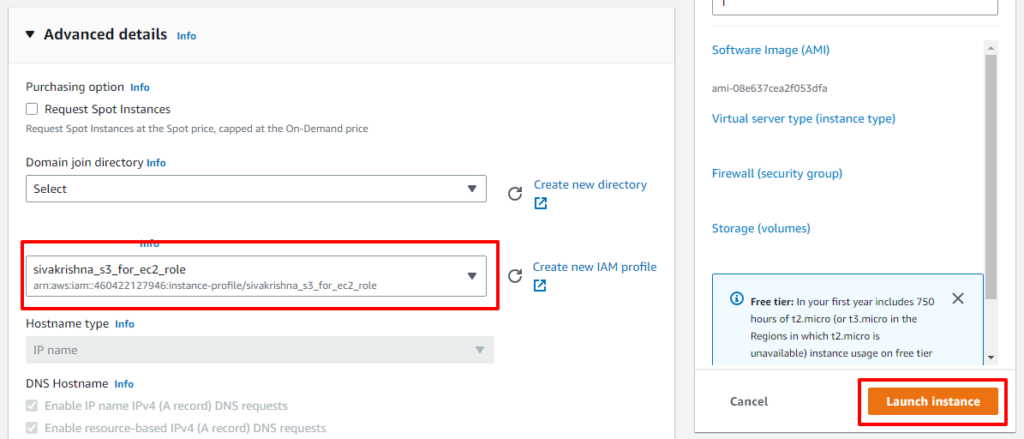
Now coming to Advanced Details.
Give Created IAM Role Here.
Then Click the Launch Instance.
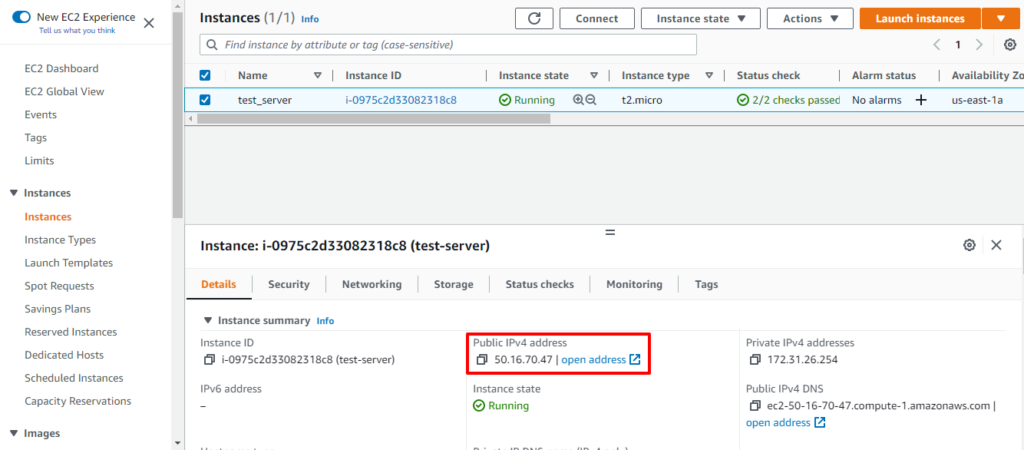
Now come again to EC2 Dashboard.
Copy the public IP address.
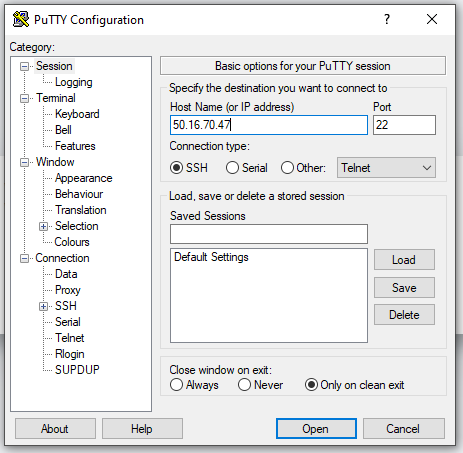
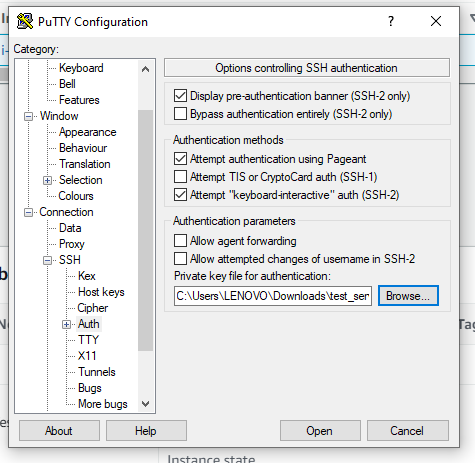
Open the putty & do the like below screen shots.
4. Create Groups & add users
Open IAM Dashboard.
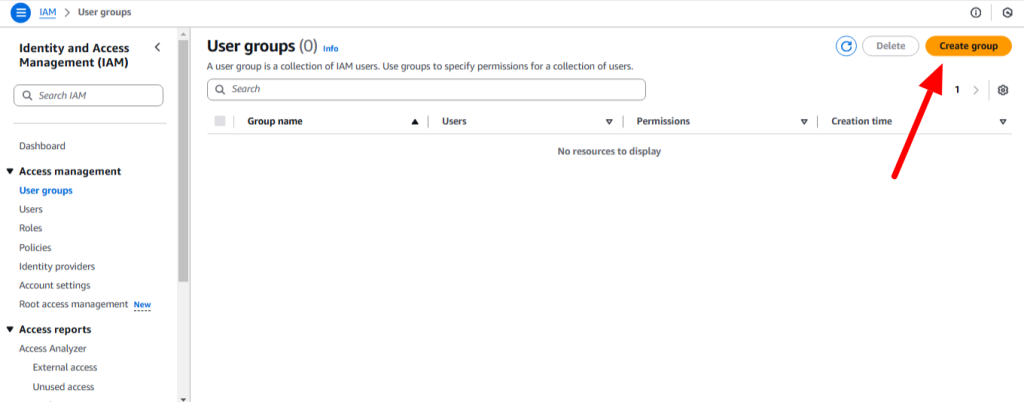
Then Select User Groups.
Now select Create Group.
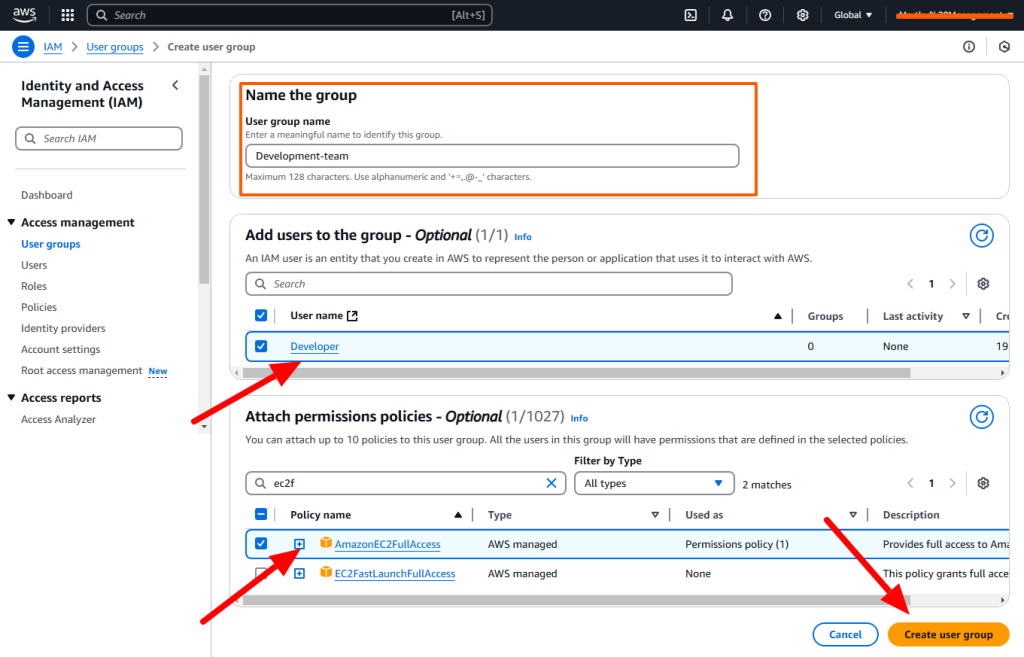
Give User group name.
Add users to this group...
Add which permissions need to group.
Then click Create group.
Now come to again Dash board & click user groups.
See your created group is here.
4. Permission Boundary Concept & Hands On
A permissions boundary is an advanced feature for using a managed policy to set the maximum permissions that an identity-based policy can grant to an IAM entity. An entity’s permissions boundary allows it to perform only the actions that are allowed by both its identity-based policies and its permissions boundaries.
Open IAM Dash Board & go to users
And Open Users. then open one users.
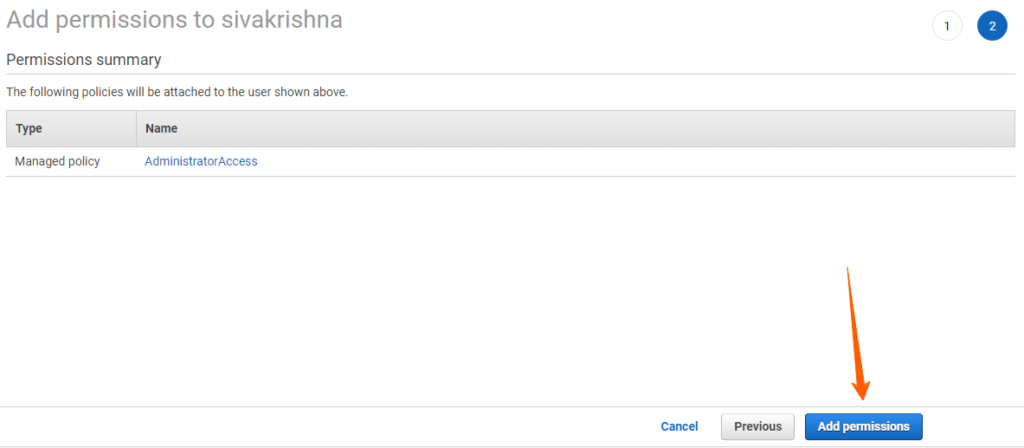
After that Check the permissions Give the Adminstor access.
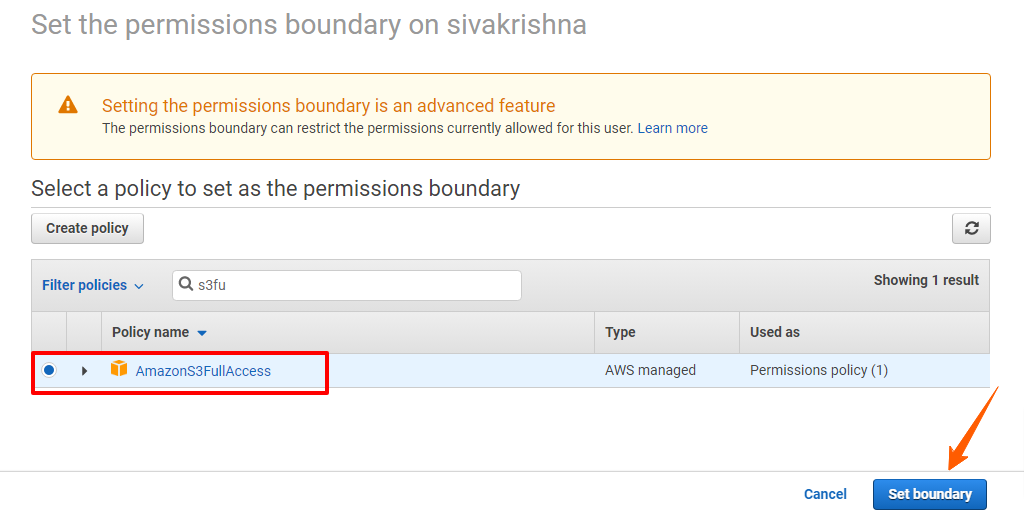
Now coming to permissions boundaries. Add S3 full Access.
Once you login the user account & check the S3. Next you can access any other services. you can't access becuse we added permission boundary. if you have added in permissions AWS administrator access it will work based on permisson boundary.
5. Setting up a password policy for your AWS Account using IAM
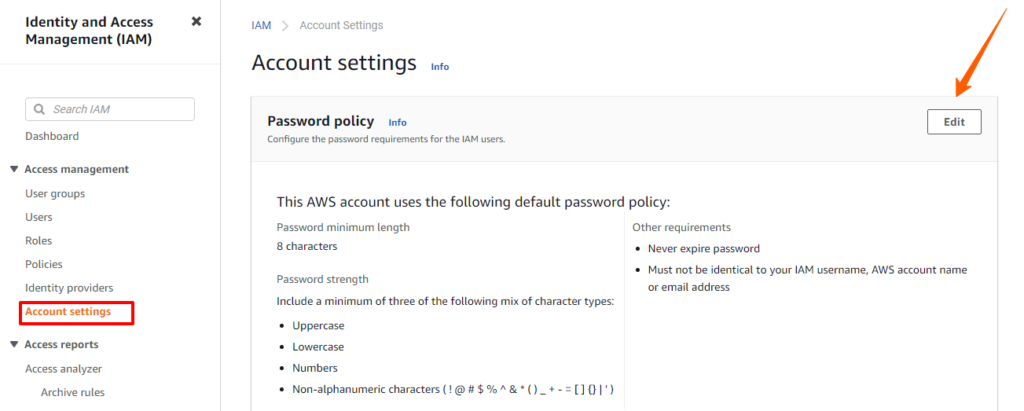
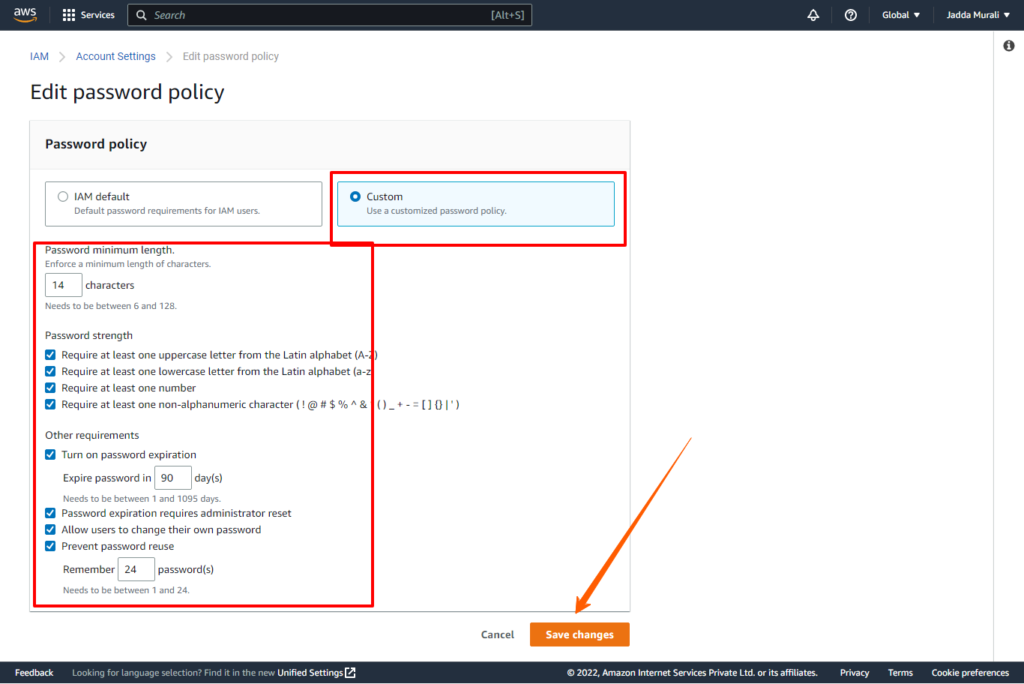
Open the IAM Dash board & select the account settings.
Then select the edit.
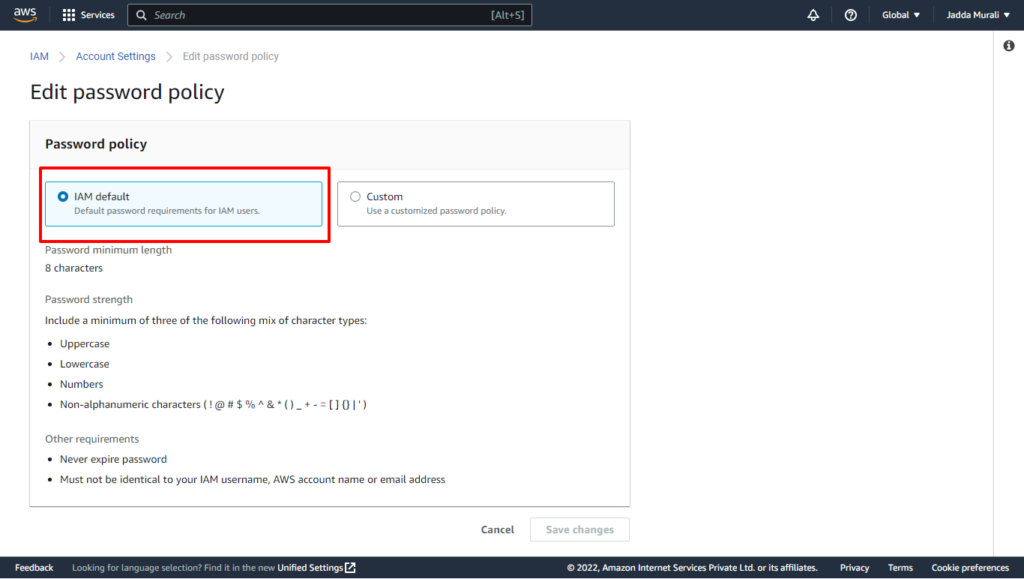
Once click the edit open below screen shot.
then default selection of IAM Default. this default policy provide by AWS
Then choose Custom.
Configure the options as you need. Then Save the cghanges.
From now onwards, it is the password policy for users.
6. Setting up Multi-Factor Authentication (MFA) using AWS IAM
Multi-Factor Authentication (MFA) protocols offer a great way to improve the overall security posture of your AWS cloud services and resources.
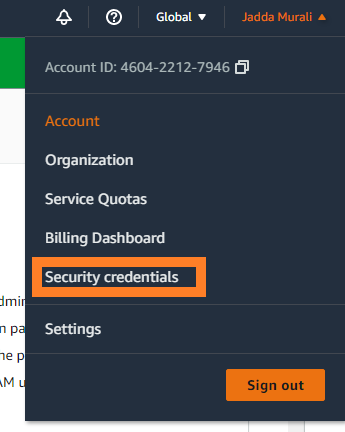
Go to the AWS console, and select your username in the top right corner
In the dropdown menu, select the My Security Credentials button
open the page top of the section titled Multi-factor authentication (MFA), then select the Assign MFA Device button.
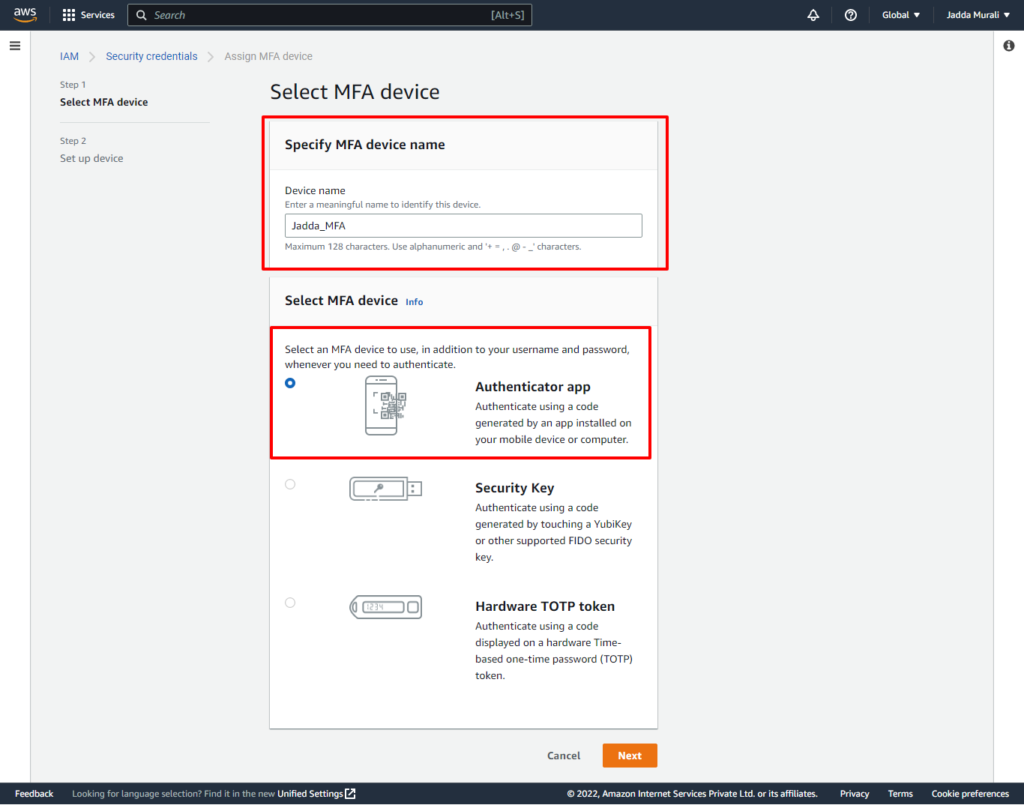
Give the Device Name.
Select the MFA Device
Then Select the Next.
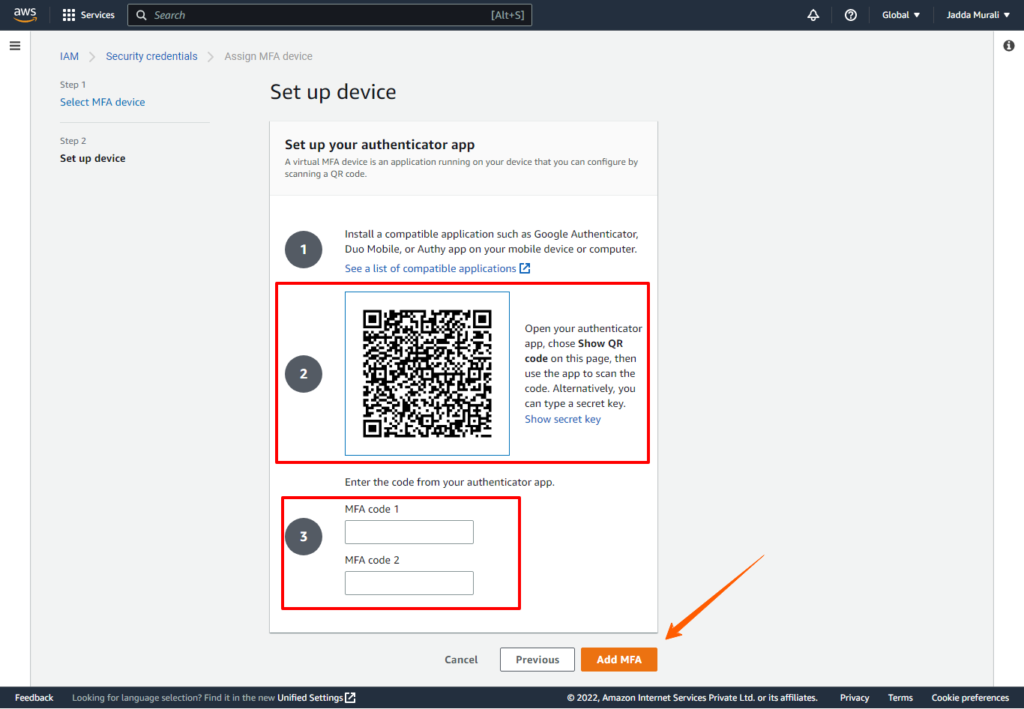
Download the google authenticator App from Play store & App store.